Introduction
Eternal Kingdom is a multiplayer turn-based strategy game. You build settlements, hire heroes and vehicles, raise armies and fight other players for control of the map. The world runs in real time.
Game day = 6 real hours. One game day fully restores stamina and health.
New-player protection: at start you receive the King's Peace effect — invulnerability for 28 game days (one real week). Regular players cannot attack you (NPCs can). Use this week to found your kingdom, build the economy, and raise a first army.
| Object | Role |
|---|---|
| Settlement | Base: gathering, building, hiring, defence |
| Worker | Gathers resources and constructs buildings |
| Hero | Combat character leading one squad |
| Squad | The troops led by a hero |
| Vehicle | Wagons, catapults, ships, minebuilder |
| Guild | A player group with a shared leader and bank |
Part 1. Getting Started
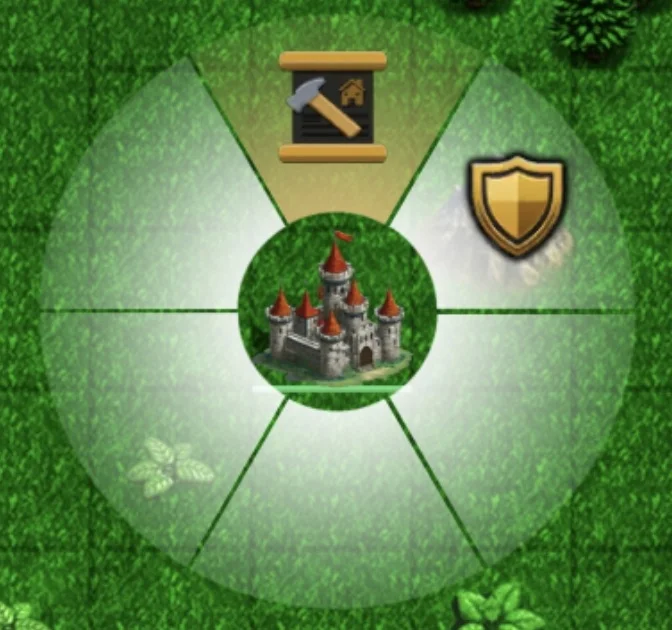
1.1 Your first settlement
You appear on the map and see your hero. The hero moves via the arrows in the lower-right corner (default). The inventory opens with a button next to them. In the inventory you have ![]() Settlers — they let you found a
Settlers — they let you found a ![]() Village, your first settlement. Your hero starts with a limited stamina pool: 7.0/7.0. Stamina can be spent at any time.
Village, your first settlement. Your hero starts with a limited stamina pool: 7.0/7.0. Stamina can be spent at any time.

Choosing a settlement site
Scan the map around your starting spot for a tile whose neighbors (the 8 adjacent tiles) include mountains and forest. You'll need them for resource extraction. It also helps to have sea access nearby (not lakes) and a forest with deep tiles. Avoid the deep forest at first — it's home to orcs, who will easily kill a lone hero without a squad. If your settlement itself sits "on a mountain", it gets an extra defence bonus.
The minimum distance between castles is 5 tiles.
First Village
Every new settlement auto-receives two buildings: a Wall and a Village Hall (the central building). A Village provides 3 workers, a storage of 12 slots, and a worker radius of 3 tiles.
- The central building sets settlement type (Village → Castle → City) and the level cap of other buildings.
- The Wall is the main defence: settlement damage hits it first (+100 HP per level, up to level 25 in a Village).
- A Village has 0 base HP: all settlement HP comes from buildings. So Wall and Village Hall (+100 and +150 HP per level) hold the line.
1.2 Economy: resources and workers
Four resources: Money, Wood, Stone, Metal. A worker's profession depends on the tile under it; it works within the settlement radius and carries the resource back (delivery takes time).
| Profession | Produces | 1 unit | Where |
|---|---|---|---|
| 30 min | in the settlement (no delivery) | ||
| 45 min | forest tiles | ||
| 45 min | mountain tiles | ||
| 60 min | your Mine (away from settlements) | ||
| vein search | 6 h | finds metal, reports the amount | |
| construction | — | at a construction site |
Notes:
- Metal depletes (a vein has a stock) and fully regenerates over ~22.5 real days (90 game days).
- Delivery: lumberjack/mason/miner spend travel time to storage =
distance × time_per_tile. Roads speed delivery, Factory speeds production, viatime × 8 / (level + 7). - An idle worker (e.g., a depleted mine) reverts to Vagabond and earns money.
1.3 Constructing buildings
- Open the construction menu in the settlement (double-click the village).
- Choose a slot and a building → resources are deducted from storage.
- The building enters a construction state with a timer.
- Assign builders — multiple share the work proportionally (2 builders = 2× speed).
- On completion the building grants new abilities and +HP to the settlement.
Costs and times of core buildings (for 1 builder):
| Building | Cost | Time | Effect |
|---|---|---|---|
| Wall | 1 money, 1 wood, 1 stone | 1 h | +100 HP/lvl (main defence) |
| Tavern | 5 money, 2 wood | 1 h | hire heroes, buy Settlers |
| Barracks | 10 money, 5 wood | 3 h | produces Militia |
| Shooting Range | 5 money, 5 wood | 6 h | produces Archers |
| Bank | 10 wood, 10 stone | 10 h | financial management (your balance survives even if the bank is destroyed) |
| Workshop | 15 money, 10 wood | 4 h | vehicles (Boat/Wagon/Catapult/Minebuilder) |
| Village Hall → Citadel | 15 money, 5 wood, 5 stone | 9 h | settlement upgrade |
Other: Upgrade (next building tier), Increase/Decrease level (within a tier; cap set by the central building), Destroy (~50% refund), Cancel (100% refund of in-progress work).
1.4 Development
The very first goal is the Citadel — going from three peasants to five almost doubles your economy's efficiency. Don't forget to assign workers to wood, stone, and construction. From there your path can vary.
- Building a Tavern and military buildings (e.g. the Hall of Swords and the Shooting Range) lets you keep expanding and controlling territory. But the first levels of military buildings produce troops very slowly, and you won't have resources for more early on.
- A better early path: a couple of levels of Factories and Roads, then a Workshop and a Minebuilder. The Minebuilder is a vehicle that can be deployed into a mine. Before deploying, run a Geologist worker — when finished, he reports the ore amount on the tile in the journal. Minimum distance from a settlement: 3 tiles. Once the mine is built, assign a Miner to extract metal.
After that you can do anything: level up military buildings, take your heroes into the forest to grind XP, and so on.
Village → Castle → City
| Type | Central building | Workers | Building slots | Storage slots | Radius | Influence cost | Counter dmg |
|---|---|---|---|---|---|---|---|
| Village Hall | 3 | 6 | 12 | 3 | 10 | 200 | |
| Citadel | 5 | 12 | 24 | 5 | 20 | 250 | |
| Palace | 6 | 18 | 24 | 7 | 30 | 300 |
What matters:
- Upgrading the central building raises the level cap of other buildings: in a Village Wall to 25, others to 5; in a Castle Wall to 75, others to 13; in a City Wall to 250, buildings to 250. A City multiplies defence and production.
- A City cannot be placed in deep forest.
- A Castle unlocks: School, Roads, Factory, Hall of Swords, Stables.
Part 2. Further growth
2.1 Influence
![]() Influence limits how many heroes you can hire into service, how many settlements will accept your rule, and how much technic you can field at once.
Influence limits how many heroes you can hire into service, how many settlements will accept your rule, and how much technic you can field at once.
- Start: 60. Grows once per real day with diminishing returns. Rough: ~100 in a month, ~130 in 3 months, ~160 in a year, ~210 cap.
- Every hero / settlement / vehicle has its own Influence cost.
- You can create a new unit if sum of existing items in that category + the new one < your Influence. Categories (heroes / settlements / vehicles) are counted separately.
Example: at Influence 60 you can hire 6 heroes and hold settlements summing to 60 (4 Villages + 1 Castle = 60). As Influence grows, so does the size of your kingdom.
2.2 Hiring heroes
A hero commands soldiers of one type (e.g., swordsmen).
You cannot wage a successful war with only one hero. The more heroes you have, each trained in different skills, the more tactical schemes you can apply (e.g., one hero leads knights into attack, another covers with archers, a third scouts).
Heroes do have a small personal attack and can move on their own, but most heroes feel much more confident with several dozen swordsmen between them and the enemy.
A unit's general parameters come from the squad type it commands, but the hero applies his combat skills to those soldiers.
At a settlement with a Tavern:
- Hero price: 100 money + an Influence check (cost 10).
- Type: man / woman (mechanically equal). Base stats: melee 60, HP 100, defence 20%/20%, stamina 7, inventory 6 slots (→12 at level 5).
- A dead hero is revived at the Tavern for 200 money (available ~1 real day after death; if you don't revive within 30 days, the hero is lost forever).
2.3 Squads: recruiting and forming
Recruitment pipeline:
- Military buildings accumulate recruits over time: Barracks → Militia/Spearmen, Shooting Range → Archers/Crossbowmen, Hall of Swords → Swordsmen/Knights, Stables → Scouts/Cavalry. Upgrading the building adds the second type.
- "Recruit" spends resources (price per unit) and adds troops to storage. Accumulation speeds up with building level (
×8 / (level + 7)). - Hand the squad over to a hero via the item menu in the settlement inventory.
Squad size is capped by Leadership. Leadership sets how many cohorts the hero's squad can hold, and the size of one cohort depends on the troop type:
Max count = (4 + Leadership) × Cohort[type]| Squad type | Cohort |
|---|---|
| 15 | |
| 10 | |
| 7 | |
| 5 |
Example: with Militia (cohort 15) at Leadership 0 a hero leads 4 cohorts × 15 = 60 soldiers; at Leadership 4 — 8 cohorts × 15 = 120.
Squad transfer from a hero: to another hero — only the same type and within their Leadership cap, costing stamina proportional to the share of the donor hero's maximum. Or hand troops over to a settlement/vehicle as items. If a hero gives away troops, he loses the percentage of stamina equal to the share of those troops. Without enough stamina, the transfer fails.
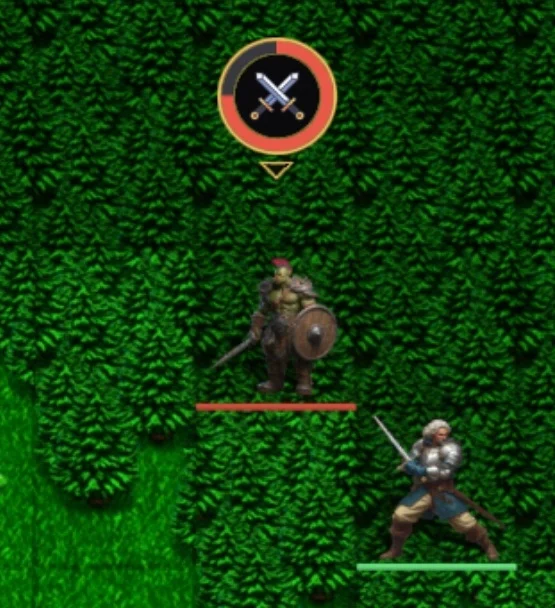
You can roughly estimate the size of another hero's squad by the health bar under them.
| Squad size | Health bar |
|---|---|
| ≤ 4 soldiers | 0.08 |
| ≤ 8 soldiers | 0.17 |
| ≤ 14 soldiers | 0.31 |
| ≤ 25 soldiers | 0.56 |
| ≥ 25 soldiers | 1.00 |
2.4 Leveling a hero
XP comes from kills (a hero / village = 100, a Castle = 500, a City = 1000). Level curve:
| Level | 2 | 3 | 4 | 5 | 6 | 7 | 8 | 9 | 10 |
|---|---|---|---|---|---|---|---|---|---|
| XP needed | 100 | 250 | 400 | 650 | 950 | 1350 | 1950 | 2650 | 3450 |
So reaching level 10 ≈ 35 hero/orc kills. Each level grants 1 skill point (10 total).
| Skill | Effect per level |
|---|---|
| +12% melee damage | |
| +12% ranged damage | |
| +5% HP and +12% defence (hero and squad) | |
| +1 cohort to the hero's max squad | |
| +12% stamina | |
| reduces own visibility and enables scouting |
The cap of each skill is 4; reaching 3 requires a School in the settlement under the hero, reaching 4 requires an Academy.
- Hero inventory: 6 slots, 12 from level 5.
- Hero carry limits: Settlers — 1, Wood — 25, Metal — 20, Stone — 10, Money — unlimited.
Typical builds:
| Squad | Skills |
|---|---|
| Swordsmen / Cavalry | 4 Leadership, 4 Melee, 2 Logistics |
| Knights | 4 Leadership, 4 Endurance, 2 Melee |
| Archers / Crossbowmen | 4 Leadership, 4 Range, 2 Logistics |
| Militia / Spearmen | 4 Leadership, 4 Melee, 2 Logistics |
| Scouts | 4 Logistics, 4 Spy, 2 Leadership |
These are just some effective builds. You can — and sometimes should — deviate.
2.5 Vehicles
Vehicles are built in a settlement that has a Workshop:
| Vehicle | Workshop level | Cost | Time | HP | Attack (mel/rng/dist) | Carries |
|---|---|---|---|---|---|---|
| I | 50 money, 15 wood | 18 h | 300 | 30/30/2 | 1 hero / 1 vehicle | |
| I | 25 money, 25 wood, 15 metal | 12 h | 200 | — | cargo | |
| I | 10 money, 5 wood, 5 metal, 5 stone | 12 h | 200 | 0/150/5 | — | |
| I | 50 money, 20 wood, 5 stone | 7.5 h | 500 | — | — | |
| II | 190 money, 50 wood, 20 metal | 36 h | 1000 | 50/100/3 | 1 hero / 1 vehicle |
Ships must be launched into the water. If the settlement that built them is far from the sea, moving the ship on land burns all of its stamina. A ship can carry a hero or a vehicle. A hero who ends up in water drowns. No exceptions. Even if he's very brave.
Part 3. Combat and Tactics
3.1 Defence stance
Most units can enter a ![]() defence stance. In this stance the unit stands guard and automatically attacks an enemy (within its attack range, when able), if enemy moves or attacks any unit belonging to you or your ally.
defence stance. In this stance the unit stands guard and automatically attacks an enemy (within its attack range, when able), if enemy moves or attacks any unit belonging to you or your ally.
Such automatic attacks cost no stamina, but entering the defence stance halves the unit's maximum stamina. That way your troops can fight back even while their owner is offline. An attacked unit always strikes back, even if it is not in defence stance.
- To set the defense stance, a unit must have at least half of its maximum stamina.
- Only the "top" unit on the cell can be on defense, i.e. the stance is not available for units in the city or transport.
A unit cannot move from one tile to another that is adjacent to enemy units. Exception: hero without squad.
3.2 Squad damage
Two ways to attack an enemy:
Damage scales with squad count — a large squad hits many times harder. Preserve your soldiers and reinforce them whenever possible to keep damage at maximum.
Damage depends on the squad types fighting:
- Spearmen → 150% vs Scouts, 140% vs Cavalry.
- Crossbowmen → 150% vs Knights, 135% vs Cavalry.
- Swordsmen → 70% vs Scouts and Cavalry.
Terrain matters just as much (also applied to the attacker):
- Cavalry and Scouts — 50% in forest and mountains (much weaker on rough terrain).
- Archers / Crossbowmen / Spearmen / Militia — 70%–80% in mountains/forest.
3.3 Tactical tips
- Shoot first. Archers/crossbowmen profitably soften the enemy before contact.
- Pin shooters. A ranged attack is blocked if an enemy stands adjacent to the attacker — by standing next to an enemy archer you deny its shot.
- Wall first. On defence the Wall takes damage first, shielding the other buildings.
- Damage to a building strips its levels — the higher the level, the harder it is to fully destroy.
- Use terrain and matchups: Spearmen vs Cavalry; never lead Cavalry into forest/mountains (×0.5).
- Numbers win — retreat to heal and reinforce if your squad is depleted.
- Deep forest hides (visibility drops to 1) — ambushes and the risk of sudden orc encounters.
- Post-attack exposure — right after an attack, the unit's visibility jumps to 15 for a short time.
3.4 Fighting orcs (PvE)
Orcs are AI heroes (twice as tough as a player: melee 120, HP 200) with a full squad, spawning in the deep forest. They are a serious threat to an unprepared player — especially those who treat warnings in guides as optional.
- Always in defence → attacking or moving into range draws a counter; pick type/numbers for a favorable trade.
- Respawn constantly (in ~2 real days with a fresh full squad) — a steady source of XP (100 per orc) and loot.
- The fallen leave a grave with loot.
How orcs behave. Orcs are territorial guardians of the deep forest — learn their rules and they turn from a death sentence into a reliable farm:
- Bound to their lair. Each orc guards the spot where it spawned and won't chase far from it. Back off and it gives up, returns home, and patrol.
- They never leave the deep forest. Step out onto open ground and you are safe; orcs do not pursue beyond the dark tiles. But they can also attack the forest border.
- Sudden ambush. In the deep forest Visibility drops to 1, but orcs Detection is 1, so an orc notices you at 2 tiles.
- Orc archers kite. Ranged orcs hold 2 tiles and keep shooting, rush them and they back off to keep firing instead of fighting in melee.
- Melee orcs close in to strike. Tank them with melee squad while your archers do the work.
- Their stamina is not infinite. Orcs moves steadily and try to keep a reserve of stamina to strike, but it is possible to exhaust them.
Pick melee heroes you are willing to constantly reinforce (e.g. from the Wagon) and lead them in to block orc archers. Once spotted and pinned, your own archers easily out-shoot them.
Part 4. Guilds
In large conflicts the winner is not the one with the strongest hero, but the one who best coordinates with allies.
- Joint armies. Several players can assemble a strike force from different troop types: swordsmen, archers, cavalry, scouts.
- Economic support. Veterans can help newer members with resources.
- Scouting and territory control. More players means more of the map watched.
- Settling dangerous lands. The deep forest and frontier territories are far safer with allies nearby.
- Politics and diplomacy. Alliances, joint wars, and major operations usually take place between guilds.
- Create a guild: 1000 money in the bank account.
- Roles: Leader and Member; the Leader manages membership.
- Invitations expire after ~1.75 real days (7 game days).
- Allies do not block your movement with zones of control, and there are no auto-counters between you — you can move and defend together.
Сonclusion
The first hours of play are relatively calm. You build a village, gather resources, and get to know the surrounding lands.
Then come your first heroes, squads, and expeditions into the deep forest. You found new settlements, build castles and cities, craft vehicles, and extend the influence of your kingdom.
But the real game begins when major states appear on the map.
Borders meet. Alliances are forged and broken. Former allies become rivals; yesterday's enemies may suddenly be the only force capable of stopping a new contender for dominance.
In Eternal Kingdom there is no final victory. There is always a new opponent, a new war, a new city to build, or a new territory to settle.
Don't fear mistakes. Good luck building your kingdom.